Monday 11 May 2015

Star Wars Imperial Assault: AT-STs and the Heroes

As ever, it has been an extraordinarily long time since my last post. I tend not to do much painting when I'm at uni (ferrying models and paints between homes can be a pain...) but I always manage to get some things done during the holidays.

So, while I should have been preparing for, and writing, the numerous essays which I had to hand in last Friday (don't, it was a hellish two weeks) I painted a set of miniatures for a friend of mine from a Star Wars boardgame called Imperial Assault. We've yet to play it, but it looks like great fun...


Unfortunately, I gave a lot of the models back to their owner before I thought to take a picture of them for the blog, but I did get some snaps of the 'heroes' and the AT-ST walkers, which were a joy to paint! 

The Heroes (minus the Wookie...)
The heroes are really well sculpted (mostly) and convey a lot of character. My favourite is definitely the Smuggler in the middle - great pose and a very cool jacket. Not too sure about the General chap (back row on the left) - his pose seems a little "brap-brap-gangsta-pistol" to me... 

The Basic AT-ST


General Weiss in his AT-ST


The walkers were really good fun to paint. There's obviously not a huge variety of colour choices because they are... well, grey. I really enjoyed adding the weathering though, and grey is a grey-t colour to weather - all that dirt and rust and grime shows up really nicely.

Unfortunately, the little bloke poking his head out is pretty awfully sculpted, to the point where his face begins to resemble an amorphous blob. This is, however, my only criticism of these guys and it doesn't ruin the model or anything like that - the details on these walkers is great and painting them was a great little trip down memory lane.  

Will hopefully be posting more things soon, stay tuned!

Wednesday 3 December 2014

An Imperial Knight and the Ortegas

Well it's been a hell of a long time since I posted anything on the blog... I've not given up on painting just yet though (although I haven't done any for a couple of months now and I'm really starting to get the itch). I'll soon be heading home for the Christmas break and I'm looking forward to picking up a paintbrush again - I think I have a copy of Space Hulk waiting for me... Can't wait!

In the mean time, I thought I'd just throw up a couple of things I did over the summer.

First, I had a crack at an Imperial Knight. These models are insanely detailed and it was really cool to work on a big model like this. Only have one picture of it as it was given to the customer upon completion...
Scary.

The flame effect was really fun, and fairly easy, to do. It just took time and a lot of carefully applied layers. But the beauty is that not a great amount more detail needed to be done and there was no messing around with transfers and such (usually these guys are covered in them - I know from experience, I've painting 5 of these guys now...).

If you haven't heard of Malifaux you really should have by now. It's a really enjoyable skirmish game for which they released a new rule-set about a year ago. In addition to the new rules, they have started producing (and re-producing) all their miniatures in plastic and the detail is INSANE. I have one or two plastic box-sets at home and will be returning to them over Christmas I'm sure.

Pictured here are the Ortega family in their original metal casting. I completed these just before Wyrd released the plastic version of the same gang... Sod's Law. The picture quality isn't great, so apologies for that.


As ever, thanks for reading. I hope to be posting up some more things over the Christmas break - we'll see!

Friday 10 August 2012

Lemartes!


Started and finished this guy today. Way too hot to be painting... 


Relatively happy with how he turned out, I tried not to take too long but still get a good result. He just needs a bit of grass on his base and he's good to go!

Comments and criticism please people! Peace.

Tuesday 7 August 2012

Hard at Work - Tomb Kings, Necrons and Imperial Guard

Hi folks, it's that time again - a long overdue post about what's been crossing my painting table of late.

First of all, I spent a bit of time finishing off some Imperial Guard I still had sitting in a box somewhere. I collect an Imperial Guard army but it's no longer in this colour scheme, so I'm considering selling these guys on sometime soon. 


I've got some more pictures, which I'll probably put up when I decide to sell these boys.

Since I last posted I also have painted up another set of Necron Barges for a customer who wanted a red and black theme throughout his army, with green spot colours in the shape of lights and dials and whatnot. Here is the finished result:


Apologies for the bad quality of the photos - they were taken on my phone...

I then went from painting futuristic skeleton warriors to Fantasy skeleton warriors for a Tomb Kings commission. Here is the host readied for war (and the tournament that the customer was taking them to):


Again, I apologise for the rubbish quality of the pictures, they hide some of the detail, but you get the general idea - I've been busy!

The next project is to be part of a Death Company Blood Angels army. The challenge here is to paint white - always a difficulty - as the customer wants his chaps painted in the colours of the Flesh Tearers' Death Company. Alongside 15 blood-crazed close-combat powerhouses I have Tycho, Lemartes, Mephiston and Gabriel Seth to paint, as well as a drop pod and a Furioso Dreadnought (both in white).


That's all for today everyone! I promise to post more regularly from here on in, but for now it's back to work. Happy painting!

Tuesday 19 June 2012

Trollkin Champions and a new Necron Commission

My first year at university is almost at a close, and I've had a busy couple of weeks going between the two places I now consider home... It's a strange feeling to have two lives in separate places; when I say 'home' I'm never quite sure which one I mean. 

Anyway, some painting has been done and I'm working on a new commission; but first, some completed Trollkin Champions:


So the things I still had to finish off were their leather straps and boots, some details on their faces and weapons and the wooden kegs in which they carry their Dutch Courage. I also slapped some snow on the base, along with a bit of grass. The snow is from Woodland Scenics - great stuff, but it needs a couple of applications. The grass is from Army Painter - these range of grass tufts come in a variety of colours and are probably the best static grass on the market.

So the next commission on my painting desk are another batch of Necron vehicles - this time for a different client. This was how far I had progressed at the time of taking these pictures, which was a few days ago.


That's all for today! I'm just trying to power through these guys, but I want to make sure the client is happy with them. Happy painting!

Thursday 31 May 2012

An Update - Finished Exams and Back to Painting Trollbloods

So it's been a studious few weeks here as everyone has been busy with their exams. Revision didn't leave a lot of time for painting so the Trollbloods have been on the back-burner for a little while. I finished exams a week ago however, and have got back to it (in between partying and enjoying the beautiful weather).


So I've taken some pictures of my progress on my new, snazzy, phone, but the quality isn't fantastic. The colours aren't quite as vibrant as they are in real life, so please bear that in mind! As they stand their skin is pretty much done, although I am considering throwing a couple of washes over it - perhaps purple, or green - to make it look a bit more like living flesh. I tried my best to achieve a smooth blend from shade to highlight on these - it's difficult, but I need to keep practising two-brush blending.


I have also finished the tartans on all five Champions now - which took quite a bit of time; there really is no short-cut for tartan, it's just accuracy and precision. Overall, I'm quite happy with the results. I didn't want the tartan to be too garishly coloured. I tried my best to keep the colours subtle so that it does not draw the eye too much. I'm set on applying snow to their bases, which will hopefully contrast well with the darker shades of the models. 

Looking at the models now, I'm wondering about perhaps lightening the skin a little more... They are meant to be Champions after all, who would have been around for a long time, which suggests that their skin needs to look a bit 'older'. It's likely that they will see another highlight. And perhaps I'll add some scratches and scars... We'll see!


That's all from me today. Expect an update around this time next week, when I'll be back in Heroes and Legends, working on some commissions. Until then, happy painting!

Thursday 3 May 2012

Wet Palette Tutorial and Trollblood Progress

Dear readers,

I have to be one of the slowest bloggers in history, but this is just something you're going to have to forgive me for - for the time being at least. Exams are coming up so a lot of my time is having to go into this crazy thing called 'studying'... Nevertheless, the fact that I have to revise means that procrastination is inevitable, and that procrastination has been put to some use!

So I'd been hearing good things about wet palettes for a while now. Since involving myself more in the miniature-painting community online I've found out more and more about the benefits that accompany painting from a wet palette. Previously I had always been quite happy with my old kitchen tile found somewhere in the deepest, darkest corners of our garage, but now that my eyes have been opened I don't think there's any reason I would go back.

Here's how:

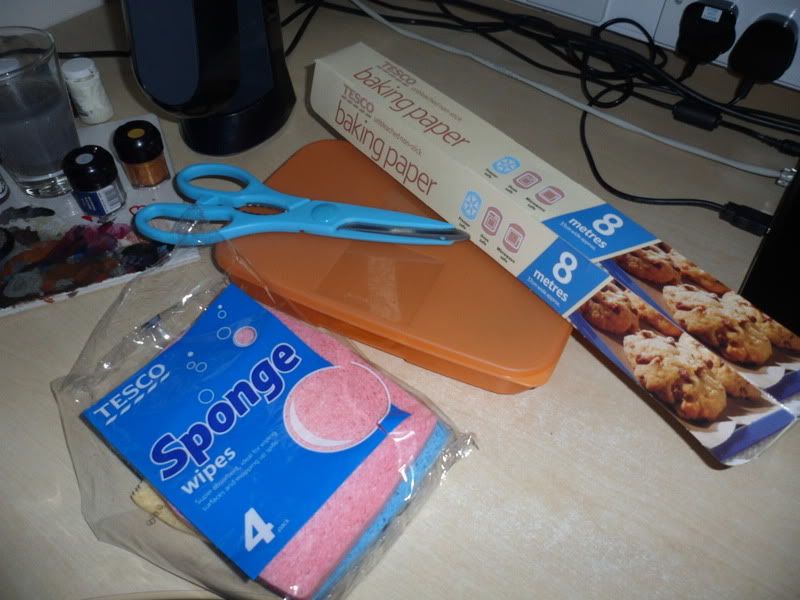
1) Collect the necessary items. You'll need:

  • A plastic box of a good size. The one I used is not very deep and this is certainly a benefit.
  • Some thin, but large, absorbent sponges. These are the ones typically used for household cleaning. I found mine in Tesco for £1.20.
  • Baking paper. I have heard parchment is suitable too, but not as cheap or easily available. This 8 metre roll was only £1.25.
  • Scissors. They don't have to be bright blue, but it certainly helps.
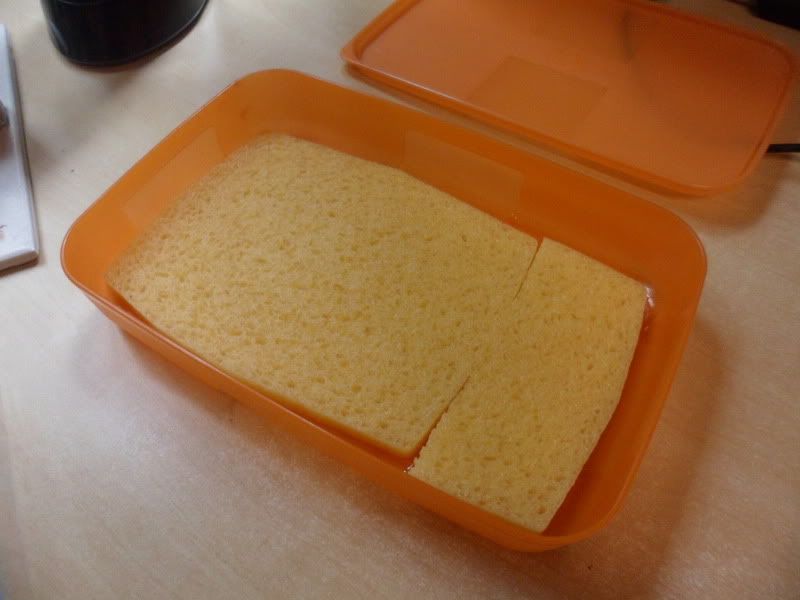
2) Cut the sponge so that it fits neatly into the bottom of your plastic box. I'm not going to patronise you by telling you to be careful with scissors... I mean, you're only cutting a sponge. You'll need just one layer, so you certainly won't be using your whole £1.20's worth in one go. The sponge doesn't have to fit right up against the edges, but you want to try and fill most of the box. 

3) Next, you need to soak the sponge so it contains the maximum amount of water it possibly can. I ran mine under a tap and let it sit in the sink for a little bit. Let most of the excess water drip out and place your sponge(s) in the bottom of your box.

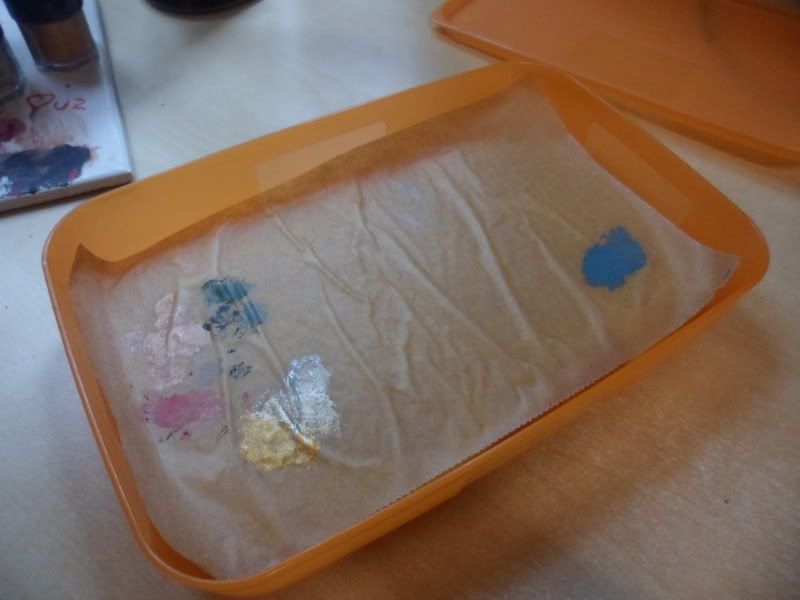
4) Finally, use your scissors again (CAREFUL!!!!11!!one!!) to cut out a bit of baking paper that will fit nicely into the box. Place this on top of the sponge and just pat it down. It should stick to the sponge nicely and will look like it does in this picture. If a lot of water droplets start forming on the surface of your palette then there is too much water under the paper - just squeeze a little water out of your sponges and try again. 

5) Apply paint as you would normally. You won't have to add too much water as the moisture will naturally dilute the paint you apply.

So that's it - simple! You only need to take five minutes or so to do this and the results are great. Paint stays wet for a long time, particularly if you seal it with a lid. I left one mixture on there for 24 hours, as a test, and I was still able to use it the next day! As a tip I would suggest not to spread your paint out too much - this will dry it out quicker - but to keep it in little pools on the palette. Give it a go people, it's a great addition to a painter's arsenal.

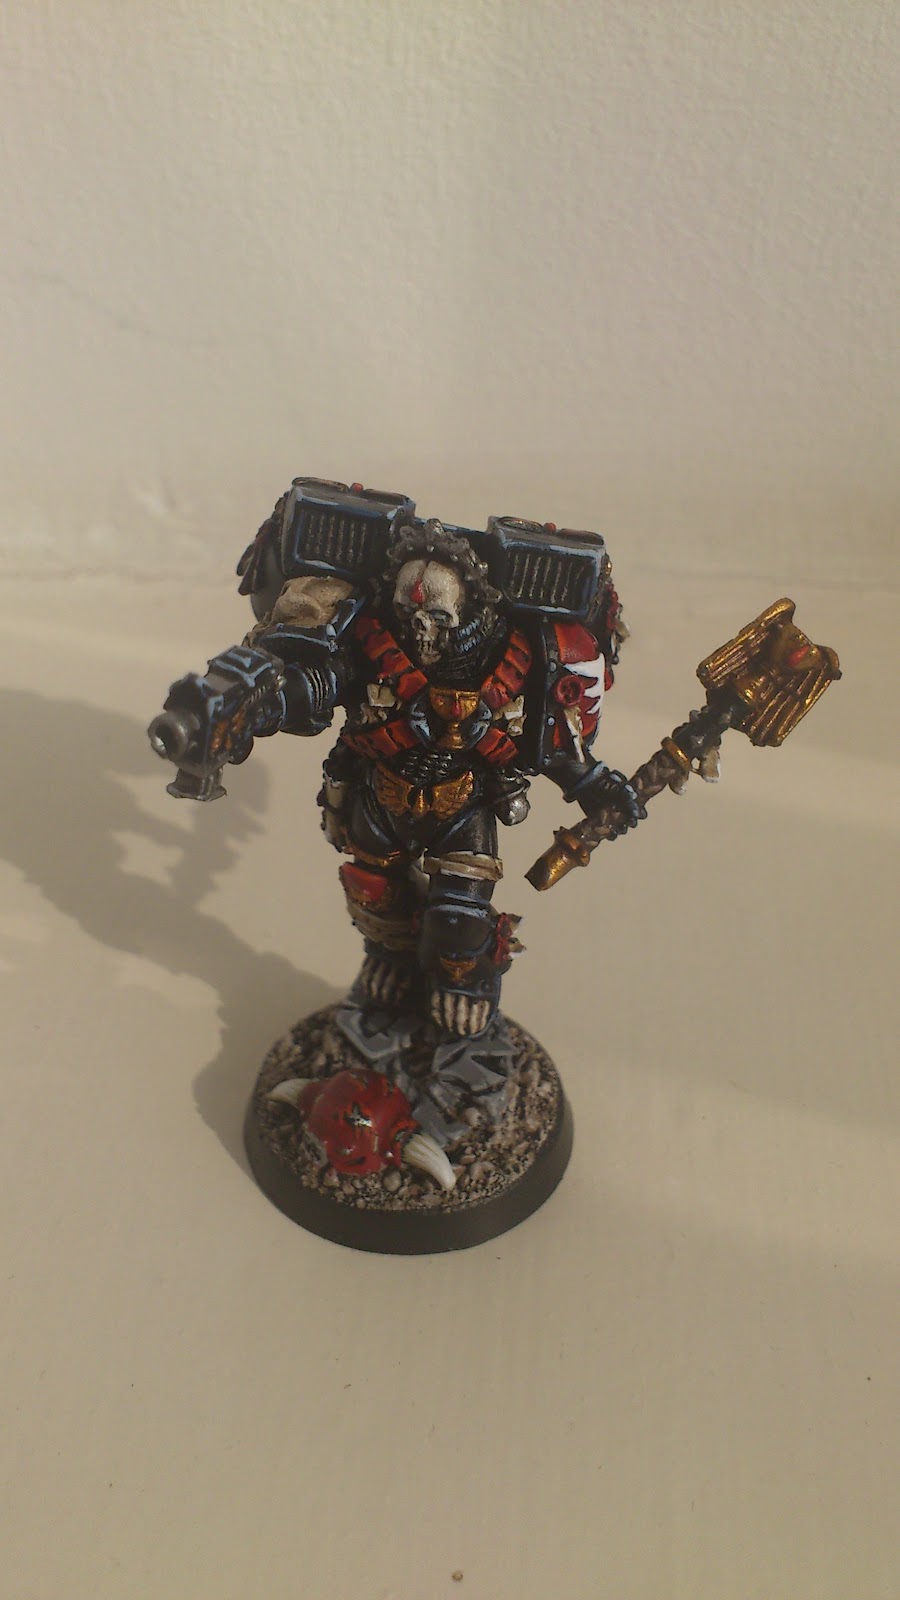
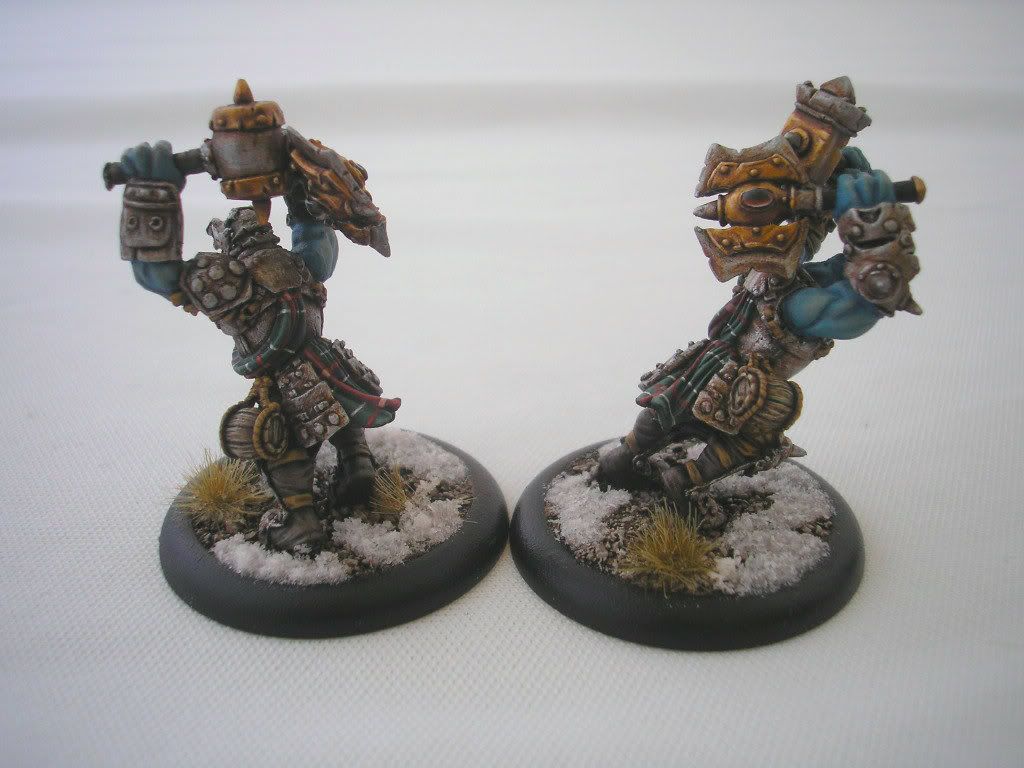
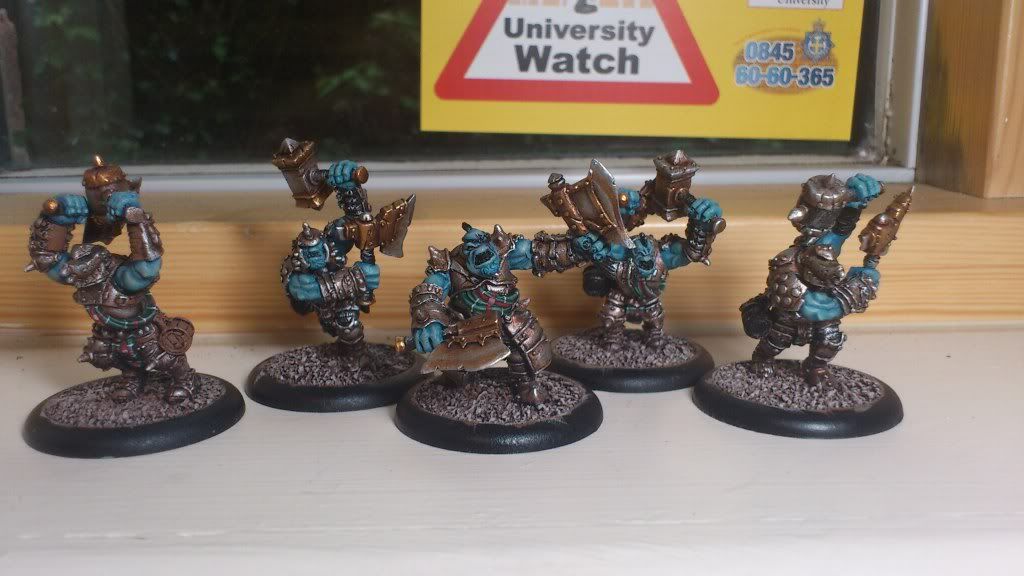
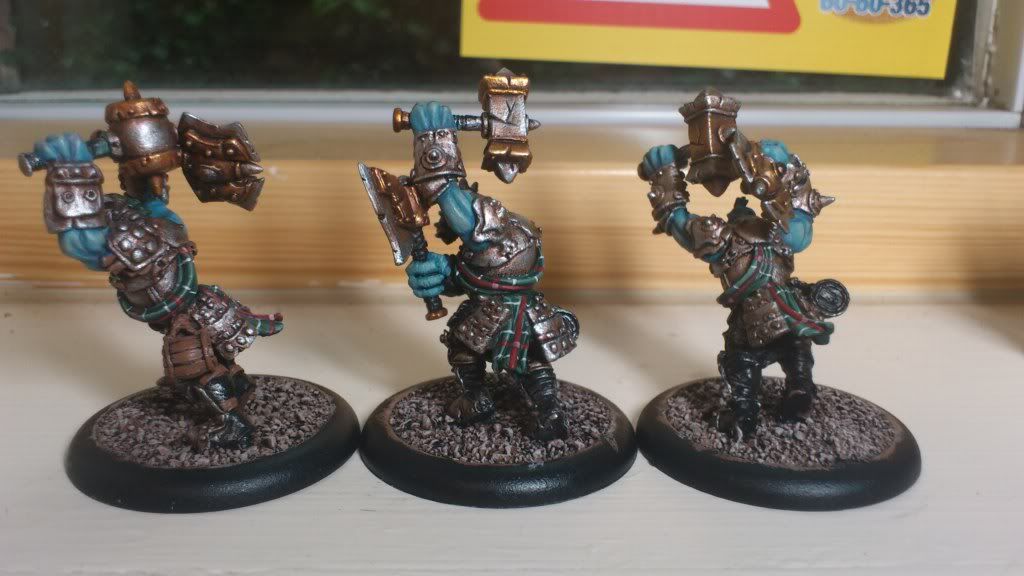
So the Trollbloods are seeing some paint every time I get sick of revision. Not a great deal has been done but I did spend a while faffing over how to do the tartan. I ended up going for a dark green shade, highlighted using Trollblood Highlight (P3) to give it a 'woolly' look. I figured wool usually isn't so vibrant and it would look strange to highlight it simply using brighter greens. For the base-coat I used Caliban Green - one of the new GW Base Paints - and I was happy with the results; it covered well and produced a strong colour.


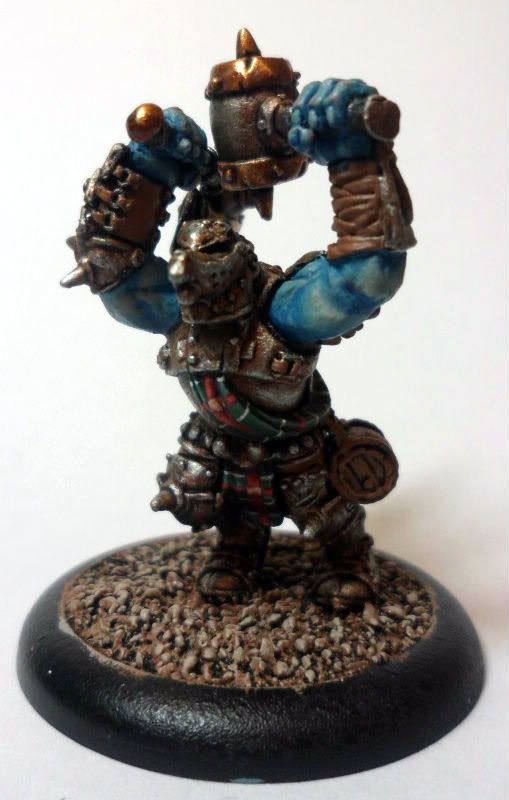
Next I used Trollblood Highlight to carefully draw the horizontal white lines across the tartan; later, after painting the red, I went back and highlighted the edges with a thin layer of Skull White.


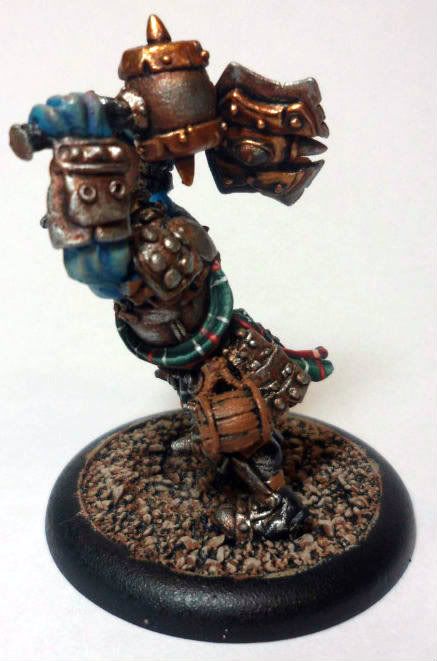
The red was painted with Sanguine Base (P3) and highlighted with Skorne Red (P3). Where the red lines crossed I carefully painted on squares of a different colour - for this I used Midlund Flesh (again - P3), which was highlighted by adding a bit of white. As you can see, I painted a horizontal red line every other white line, so that it doesn't look too 'busy'. I'm quite happy with the result, but you guys must decide for yourself! The pictures aren't great I'm afraid, I had to borrow a friend's camera because I stupidly left mine at home...


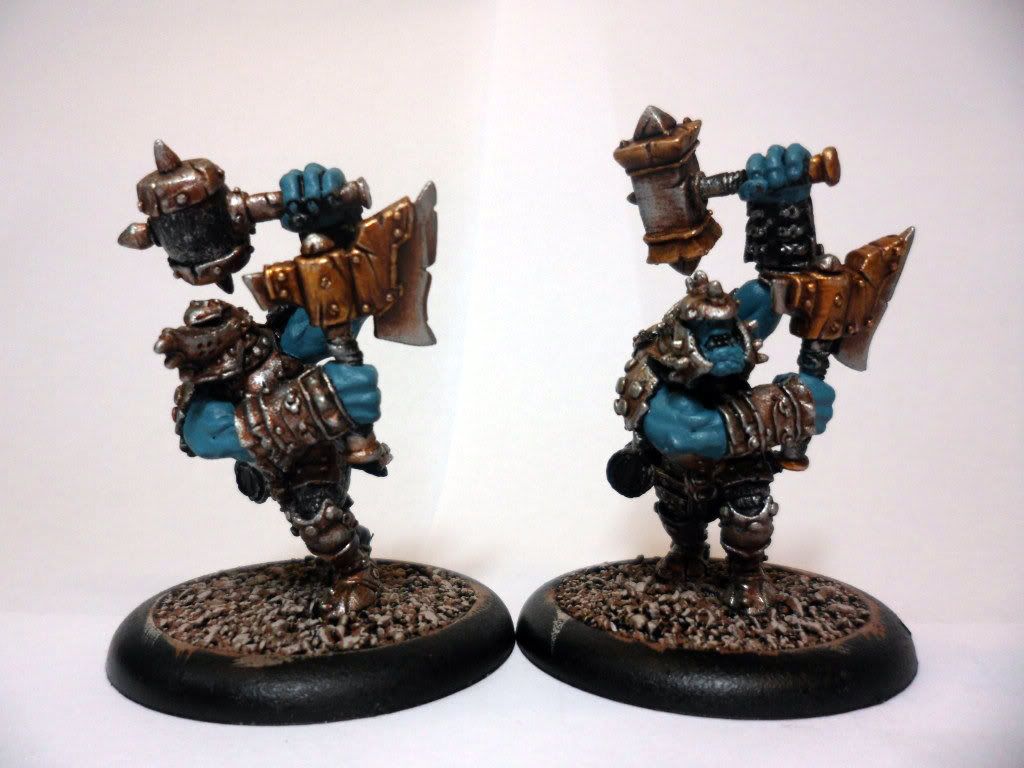
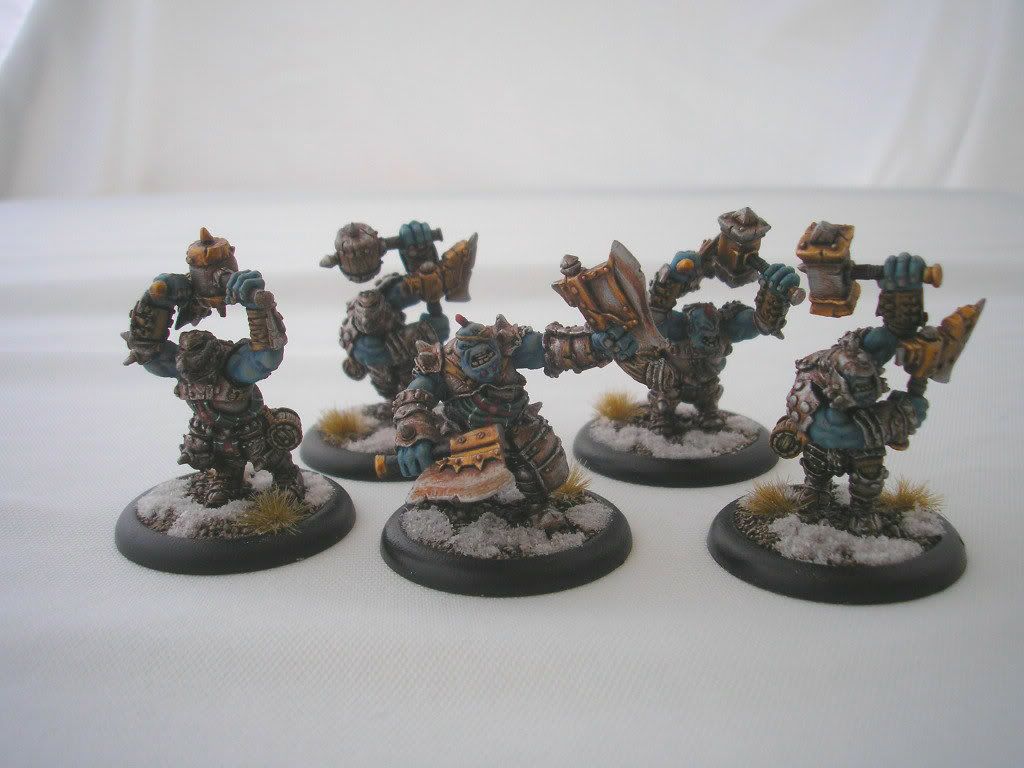
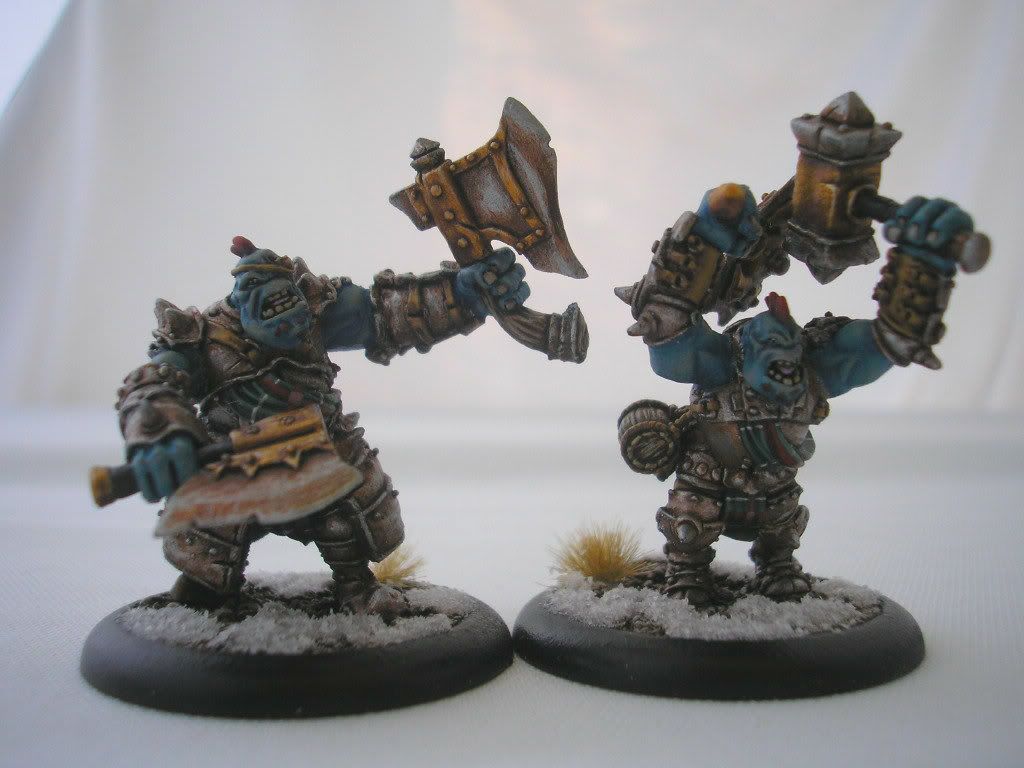
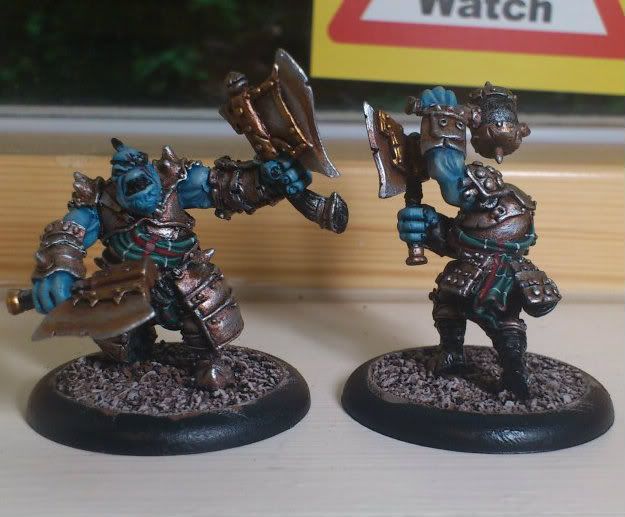
The other four Champions saw some work over the last few days as well. I finished the bronze/gold (I can never decide) on their weapons and gave their skin a base-coat. Since taking the pictures I've also shaded their skin and painted a base-coat on to the Dire Troll Mauler that will be my next project.

Well, that's it for today folks! I hope you find the tutorial useful and that you give the wet palette a go. If you have any comments, criticisms or suggestions I am always happy to read them, so please leave them below. Happy painting!